A guitar strap is more than just an accessory; it’s your key to unlocking freedom of movement while playing. Whether you’re a budding musician performing at an open mic night or an experienced guitarist rocking out on a big stage, a guitar strap allows you to play your electric or acoustic guitar standing up, comfortably and securely.
Aside from the guitar’s body itself, the strap is the most significant point of contact between you and your instrument. Therefore, knowing how to attach it correctly isn’t just about convenience – it’s crucial for ergonomic playing and enjoying your musical journey to the fullest. This guide will walk you through the process of properly attaching your guitar strap, ensuring you’re ready to play in comfort and style in no time.
Understanding Guitar Strap Types and Pins
Before diving into the attachment process, it’s helpful to understand the basic components. Guitar straps connect to your guitar via strap pins, sometimes called strap buttons. These are small, rounded metal posts that protrude from the guitar’s body.
Most electric guitars and basses come equipped with two strap pins. Many acoustic guitars also feature two pins, while some may only have one. The placement of these pins can vary slightly, influencing how the strap attaches and how the guitar hangs.
In a typical two-pin setup, you’ll find one pin at the bottom end of the guitar (the lower bout). The second pin is usually located either on the upper shoulder of the body or at the heel, where the neck joins the body. For acoustic guitars with only one pin, it’s almost always located at the bottom end of the guitar.
Knowing this basic configuration is the first step to properly attaching your guitar strap. Let’s explore the different methods based on the number of pins your guitar has.
Step-by-Step Guide: Attaching a Strap to a Guitar with Two Pins
For guitars with two strap pins, the process is straightforward and secure. Here’s a step-by-step guide to get your strap properly installed:
-
Orient the Strap: Guitar straps aren’t always symmetrical. Many are designed to be attached in a specific direction for optimal comfort and aesthetics. Look for distinguishing features on your strap. If your strap has a plastic adjustment buckle, the end with two layers of material usually goes towards the bottom pin of the guitar. Similarly, if one end is noticeably thinner, that thinner end is typically designed for the bottom pin. Straps with logos or decorative elements often have that end intended for the pin closer to the guitar’s neck.
-
Attach the Strap to the Bottom Pin: Take one end of your guitar strap and locate the pre-cut hole or slit at the end. Carefully slide this hole over the bottom strap pin of your guitar. Push it on firmly enough to ensure it’s securely in place and won’t easily slip off.
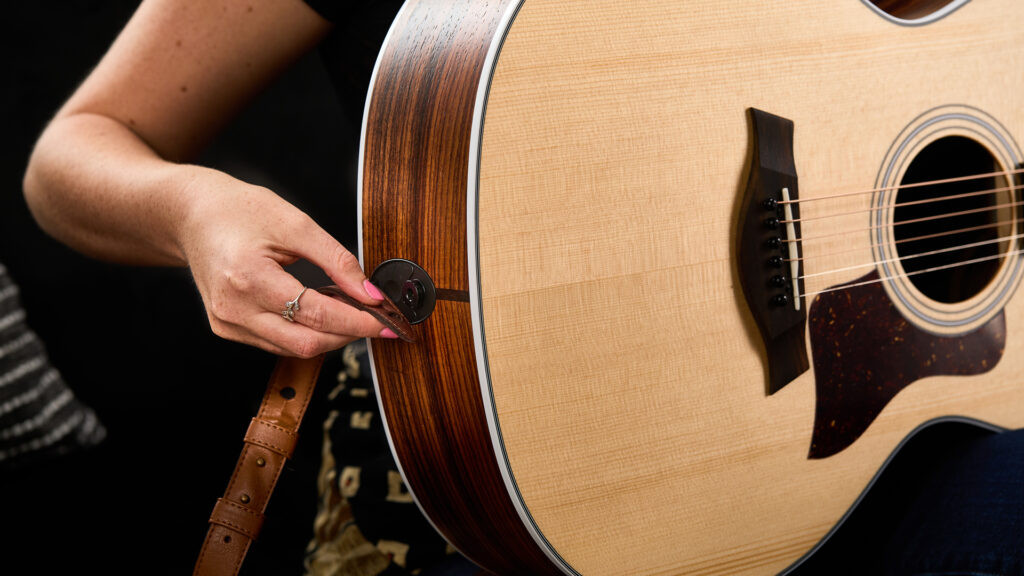 guitar strap bottom pin
 -
Attach the Strap to the Top Button: Take the remaining end of the strap and repeat the process. Insert the other strap pin through the hole or slit at the opposite end of your strap. Again, make sure it’s securely fitted over the pin.
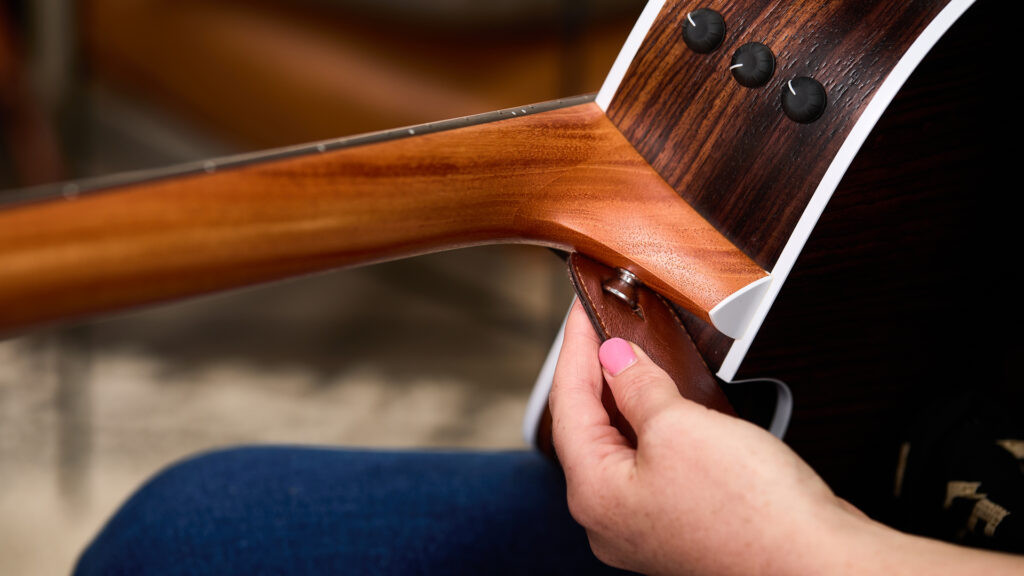 guitar strap top pin
 -
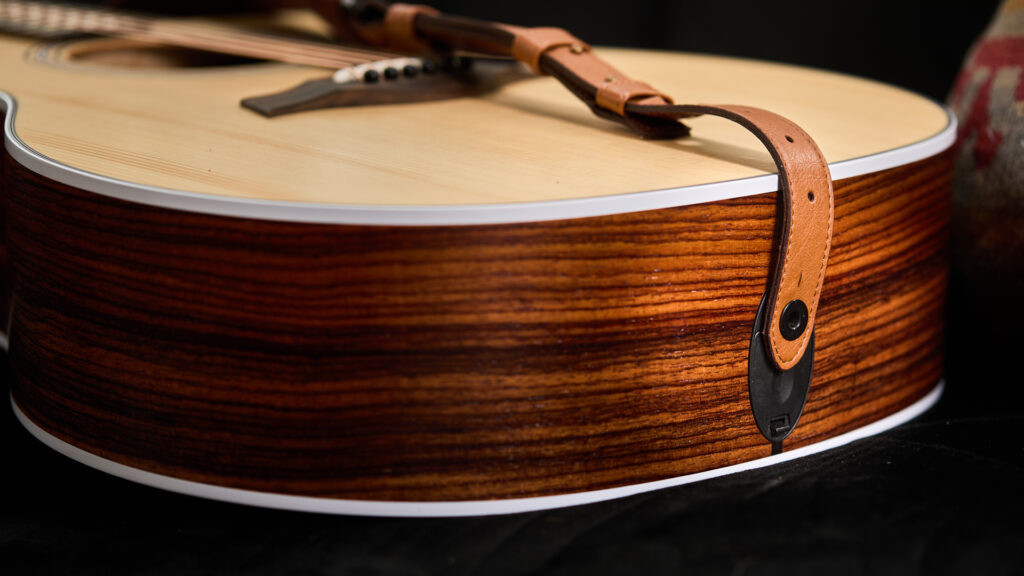
Test for Security: Once both ends are attached, gently tug on each end of the strap. This is crucial to ensure that the strap is snugly and securely fastened to the guitar. You want to feel confident that your guitar is safely supported before you start playing.
Even if your guitar has two strap pins, some players might prefer the feel of the one-pin headstock method, which we’ll discuss next. Experimentation is key to finding what feels most comfortable for you.
Step-by-Step Guide: Attaching a Strap to a Guitar with One Pin
Many acoustic guitars come with only a single strap pin located at the bottom of the instrument. While you can install a second pin, the traditional method for attaching a strap to a one-pin guitar is simple and doesn’t require any modifications to your instrument.
To begin, follow steps 1 and 2 from the two-pin method above: orient your strap and secure one end to the bottom strap pin. For the other end, instead of looking for a second pin on the guitar body, you’ll bring the strap up towards the headstock of your guitar.
Since there’s no strap pin on the headstock, you’ll need to use an additional piece of material to secure the strap. This is often done using a lace, a piece of string, or a specialized strap adapter. Many guitar straps actually come with a lace specifically for this purpose.
Here’s how to attach the strap to the headstock:
-
Thread the Lace/Adapter: Feed the lace or strap adapter through the hole at the end of your guitar strap.
-
Position at the Headstock: Thread one end of the lace (or the adapter) underneath the strings of your guitar, just above the nut (the point where the strings pass from the headstock to the fretboard).
-
Secure Tightly: If using a lace, tie a secure double knot to fasten the strap to the headstock. If you’re using a strap adapter, follow the manufacturer’s instructions to securely attach it – typically involving a small pin or button.
Attaching a strap to the headstock creates a different balance compared to a two-pin setup where the second pin is on the body. With headstock attachment, the guitar’s weight tends to feel more balanced towards the center. In contrast, two-pin setups often shift the center of gravity slightly towards the lower bout. Some players with two pins even prefer the headstock method for this balanced feel. Try both methods if possible to discover your preference.
Adjusting Your Guitar Strap for Perfect Comfort
Once your strap is attached, setting the right length is just as important as knowing how to put it on in the first place. Learning to adjust your strap is essential for playing comfortably and ergonomically, whether you’re sitting or standing.
Strap length is largely a matter of personal preference and playing style, but there are ergonomic guidelines to consider. Generally, your strap length should allow you to play without excessively bending your wrist to reach notes or chords when standing. Maintaining a relaxed fret hand and wrist is key to preventing strain and potential injuries over time.
Adjusting strap length is usually straightforward:
-
Straps with Plastic Buckles: Many straps feature a sliding plastic buckle for easy adjustments. To lengthen the strap, slide the buckle downwards, towards the guitar’s lower bout. To shorten it, slide the buckle upwards, towards the neck. You can usually make these adjustments without removing the strap from your guitar.
-
Leather or Suede Straps: Leather and suede straps often use a two-piece design for length adjustment, rather than a buckle. These require detaching the strap from the guitar for adjustment. You’ll notice that these straps have two separate pieces connected by slits.
 guitar strap adjustment
To adjust, remove the thinner strap piece from the wider piece. The slits in the wider strap piece provide different length options. Thread the thin piece upwards through a slit from the underside of the wide strap, pull it tight, and then thread it back through an adjacent slit. Continue threading it through at least one more slit as it makes its way down to the bottom strap button, re-attaching to your guitar and experimenting with different slit combinations to find your ideal strap height.
Enhancing Security: The Role of Guitar Strap Locks
After you’ve found your perfect strap length, consider adding strap locks to your setup. Guitar strap locks are designed to provide an extra layer of security, preventing your strap from accidentally detaching from the strap pins and potentially dropping your guitar.
Strap locks essentially replace your existing strap buttons with a locking mechanism that securely fastens your strap. There are various types of strap locks available, offering different levels of security and ease of use. If you’re a performer who moves around a lot on stage, or simply want maximum peace of mind, strap locks are a worthwhile investment to protect your instrument.
Choosing the Right Guitar Strap for You
Knowing how to put on a guitar strap is just the beginning. With a vast array of materials, styles, and features available, choosing the right guitar strap is crucial for both comfort and personal expression. Let’s consider some key factors when selecting your ideal strap:
Material
The material of your guitar strap significantly impacts its durability, comfort, and price. Popular strap materials include:
- Leather: Durable, classic look, often becomes more comfortable over time.
- Vegan Leather: Offers a leather-like aesthetic and feel without using animal products.
- Suede: Soft, comfortable, and provides a good grip to prevent slipping.
- Denim: Casual, stylish, and can be a more affordable option.
- Cotton: Breathable, lightweight, and often very affordable, good for electric guitars.
- Nylon: Strong, durable, often used for utility straps.
Regardless of the main strap material, the ends that attach to the strap pins are usually made of leather or suede for a secure and snug fit.
While there aren’t strict rules about material choices, certain materials are often associated with different guitar types or genres. Leather and suede straps have a traditional connection with acoustic guitars, while cotton or nylon straps are frequently paired with electric guitars. However, personal preference reigns supreme!
Generally, more expensive straps tend to be more durable. Suede and leather straps are typically pricier but can last for many years. Cotton straps are more budget-friendly and lightweight, making them great for stage use, though they may show wear and tear sooner.
Padding
A typical guitar can weigh anywhere from 4 to 9 pounds. While that might not sound like much, the weight can become noticeable during long practice sessions or performances.
Some guitar straps, especially leather and suede options, come with built-in padding. This extra layer of foam or cushioning enhances comfort, particularly during extended playing periods. While padding adds a slight bit of weight to the strap itself, the added comfort is often well worth it, especially for heavier guitars or longer playing sessions.
Width
The width of your guitar strap also plays a role in comfort. A narrower strap is streamlined and lightweight, but it concentrates the guitar’s weight on a smaller area of your shoulder. A wider strap distributes the weight more evenly across your shoulder, which can be significantly more comfortable, especially for heavier guitars or for players who primarily play standing up.
Standard cotton straps are often around 2 inches wide, while leather or suede guitar straps can range from 2.5 to 3 inches or even wider.
Aesthetic
Finally, your guitar strap is an opportunity to express your personal style and complement your guitar’s look. Straps come in every color imaginable and can feature a wide range of designs, from simple and understated to intricate embroidery, bold patterns, or even metal embellishments like conchos.
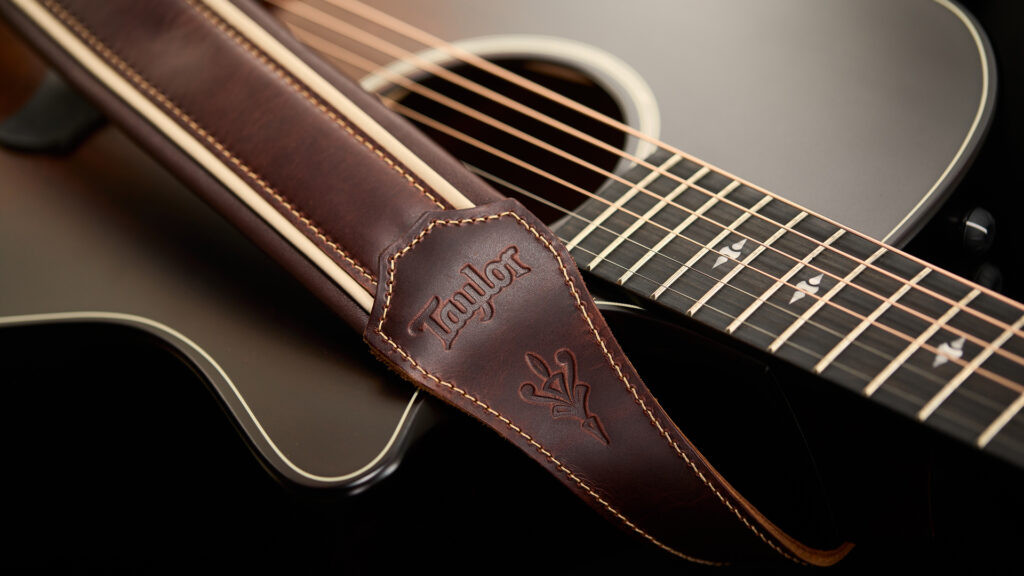 brown leather guitar strap
For a striking visual impact, consider a strap that contrasts with your guitar’s finish, like a vibrant blue denim strap on a sunburst guitar. Or, for a more subtle and cohesive look, choose a strap that complements the colors and finish of your instrument. Ultimately, choose a strap that resonates with you and reflects your personal style.
Time to Play!
A guitar strap is your partner in musical expression, allowing you to play comfortably and confidently in any setting. Beyond functionality, it’s also a reflection of your personality and style. A great guitar strap should be both comfortable and visually appealing, which is why quality and craftsmanship matter.
Now that you know how to put on a guitar strap and choose the right one for you, it’s time to strap in, get playing, and explore other essential guitar skills, like how to hold a pick and how to tune your guitar. Enjoy the journey!