The Rubber Bridge Guitar is quietly becoming a fascinating trend in contemporary music. From its subtle presence on Taylor Swift’s Folklore to the distinctive textures found in Wilco’s Ode to Joy, this unique modification is capturing the ears of musicians and listeners alike. Even artists like Madison Cunningham have showcased its distinctive voice, as seen in her NPR Tiny Desk Concert. While the concept might seem unconventional at first, the rubber bridge guitar offers a surprisingly accessible and sonically intriguing path for guitarists seeking new tonal landscapes.
What is a Rubber Bridge Guitar?
At its core, a rubber bridge guitar is exactly what the name suggests: a guitar where the traditional bridge, typically made of wood or metal, is replaced with one fashioned from rubber. This simple swap dramatically alters the instrument’s sound. The idea, as far as we can tell, originated with shops like Old Style Guitar Shop in Los Angeles and Fretworks in Chicago, who began experimenting with this modification. The result is a mellow, muted tone, often described as “thumpy” or “deadened,” with significantly reduced sustain compared to a standard guitar bridge. This isn’t about achieving pristine clarity or bright resonance; it’s about embracing a warmer, more percussive and intimate sonic character. The rubber bridge pushes the boundaries of acoustic guitar sounds, offering a unique palette that’s inspiring a new wave of creativity.
DIY Rubber Bridge: Finding the Right Guitar & Materials
The beauty of the rubber bridge modification lies in its simplicity and reversibility, making it perfect for DIY experimentation without risking damage to your prized instruments. The ideal candidate for this transformation is often an older, inexpensive acoustic guitar, particularly parlor guitars or those with a floating bridge and trapeze tailpiece. These designs are easily adaptable to a rubber bridge setup.
The author of the original article stumbled upon an old Kingstone acoustic, a testament to the fact that you don’t need a high-end instrument for this project. Guitars with a floating bridge are particularly well-suited because the bridge is not glued to the body, making the swap straightforward. Crucially, this modification is entirely reversible. You can always return the guitar to its original state simply by replacing the rubber with a traditional bridge. This low-risk, high-reward nature makes it an appealing project for any guitarist curious about exploring new sounds.
Now, the quest for the perfect piece of rubber begins. While specialized rubber bridges are available, the DIY spirit encourages resourcefulness. As the original article highlights, a simple and surprisingly effective solution can be found in common rubber erasers.
Building Your Rubber Bridge: A Step-by-Step Guide (Eraser Method)
For those eager to dive into the DIY aspect, creating a rubber bridge from erasers is an excellent starting point. Here’s a step-by-step guide based on the original article’s experience:
- Source your erasers: Look for solid rubber erasers that are approximately 3/8″ thick. A pack of two standard erasers is often sufficient to provide enough length for a guitar bridge.
- Slacken the strings: Loosen your guitar strings to reduce tension on the bridge. You don’t need to remove them completely.
- Remove the existing bridge: Carefully remove the original bridge from your guitar. With floating bridges, this is usually as simple as lifting it off once the string tension is reduced.
- Position the eraser(s): Place the eraser(s) where the original bridge was situated, ensuring they span the width of the bridge area and make contact with all the strings. You may need to use both erasers end-to-end to achieve sufficient length.
- Tune up and test: Gradually bring your guitar back up to tune. The strings will now be resting on the rubber eraser bridge.
It’s important to note that every guitar is unique, and the optimal rubber material and dimensions may vary. Experimentation is key. While erasers are a budget-friendly starting point, other rubber materials of varying density and shapes can be explored to fine-tune the sound.
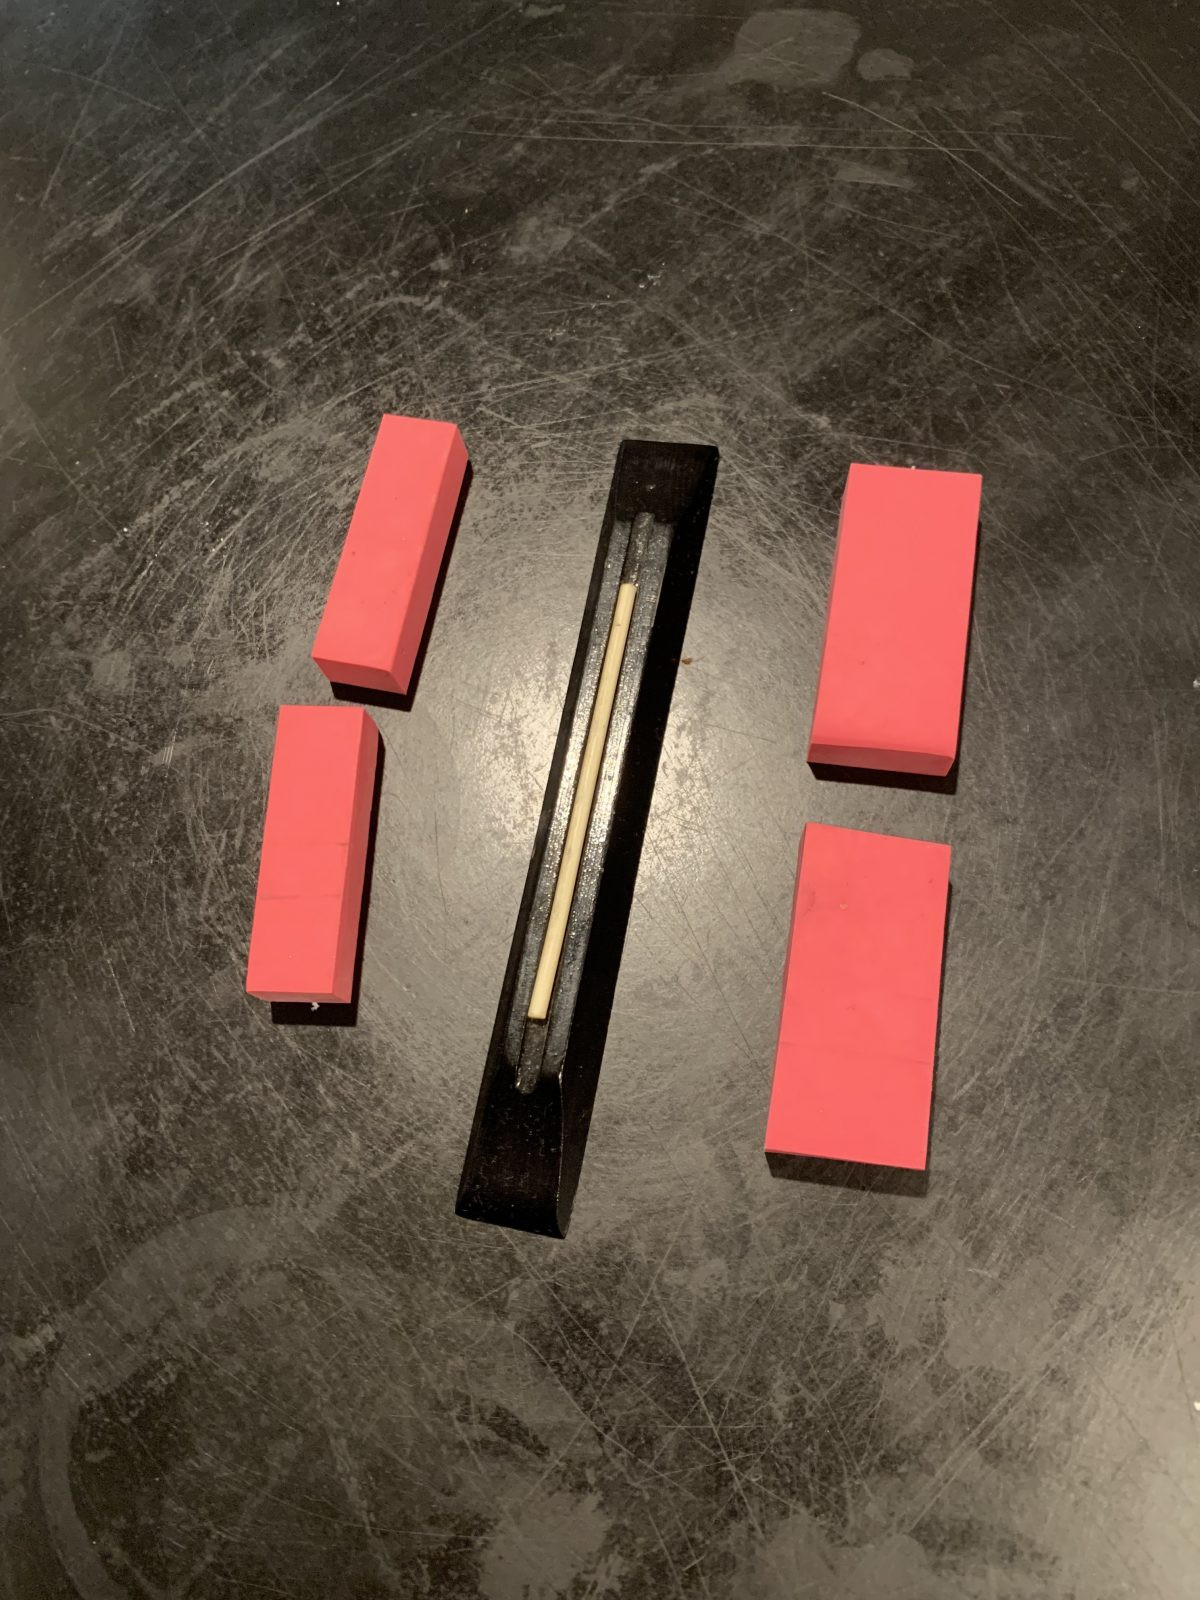 Close-up of a DIY rubber bridge made from erasers on an acoustic guitar.
Sound and Experimentation: Exploring Different Rubber Bridges
The sonic landscape of a rubber bridge guitar is remarkably versatile, and much of this variation stems from the characteristics of the rubber bridge itself. The original article delves into experimenting with different bridge widths, revealing how subtle changes can significantly impact the guitar’s tone.
A narrower rubber bridge generally allows for slightly more sustain, although the overall sound remains distinctly muted compared to a traditional bridge. It retains the “dead string” quality that is characteristic of the rubber bridge sound but with a touch more resonance. Conversely, a wider bridge maximizes the dampening effect, resulting in the most pronounced “deadened” and percussive tone with minimal sustain.
The author’s experimentation with a mixed bridge setup – wider on the bass strings and narrower on the treble strings – highlights the nuanced control rubber bridges offer. This configuration provides a balanced tone, retaining the thumping low-end while allowing the higher frequencies to peek through with a bit more clarity. These sonic nuances are best appreciated through listening, and while this article cannot convey audio examples directly, exploring online demos of rubber bridge guitars will reveal the spectrum of tones achievable.
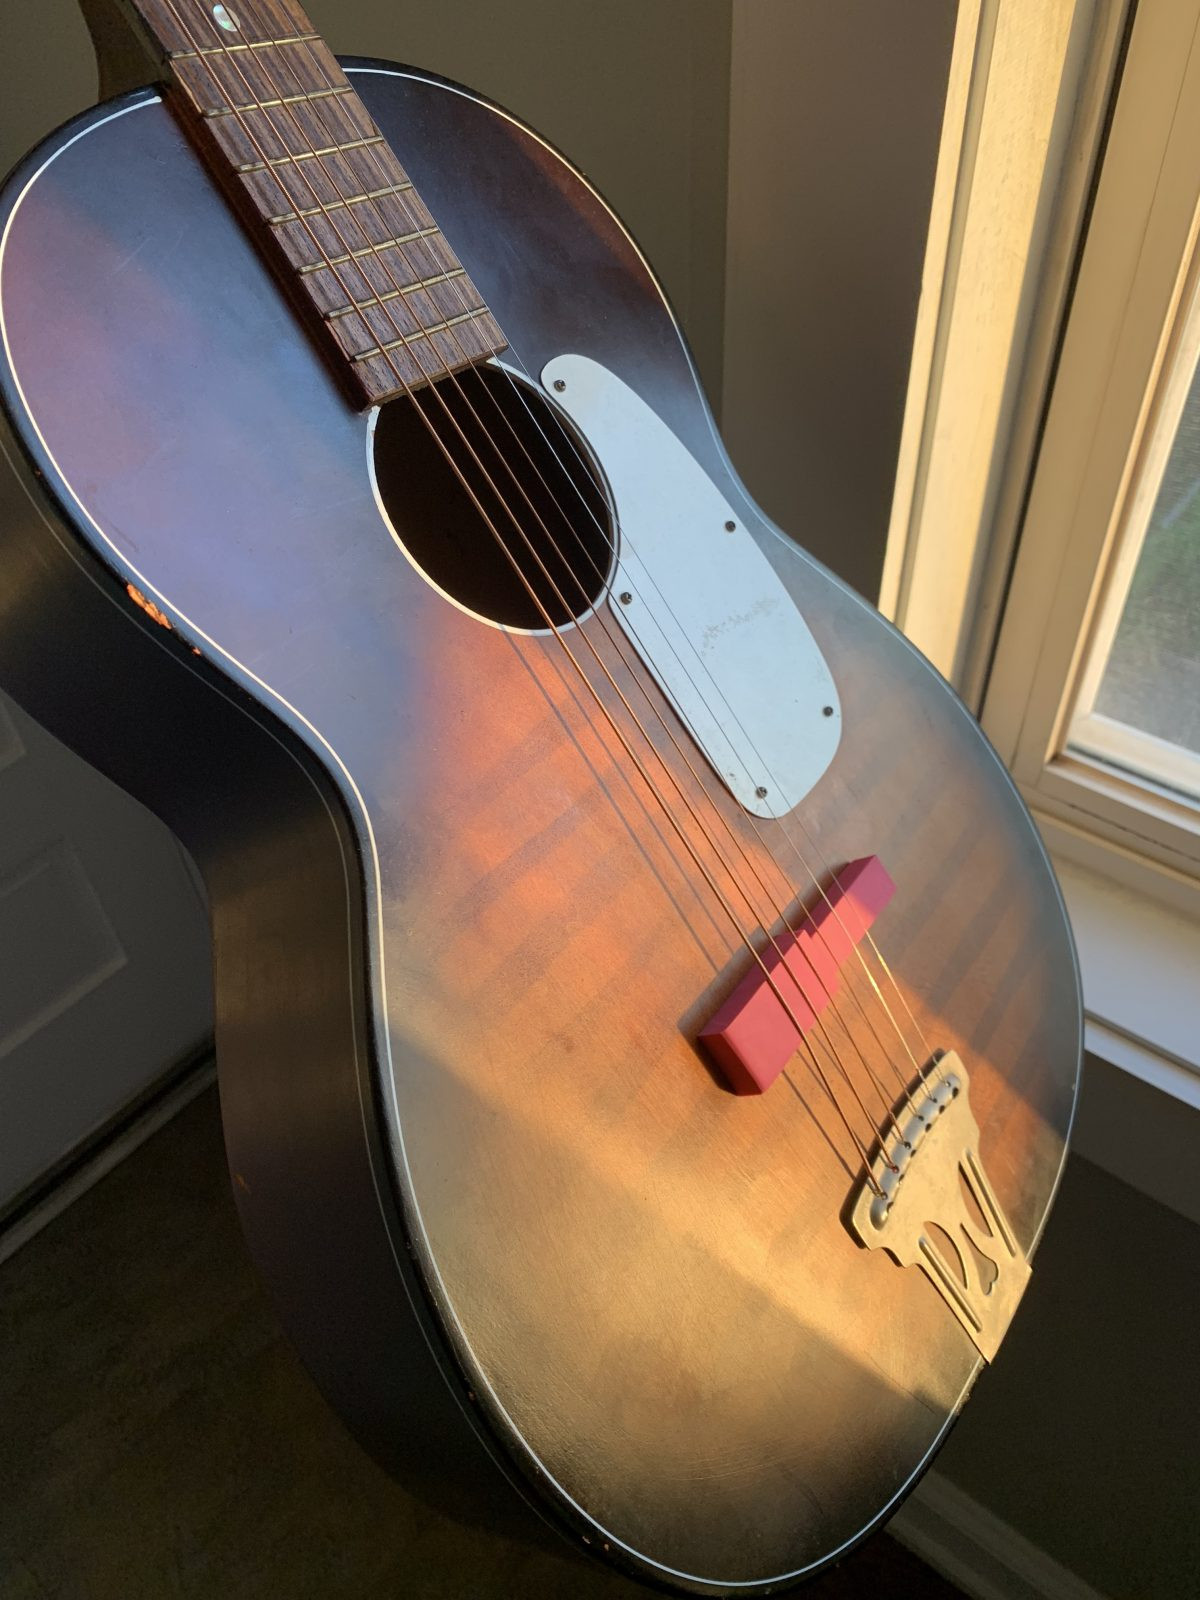 A narrow rubber bridge on an acoustic guitar, showing its minimal contact with the strings.
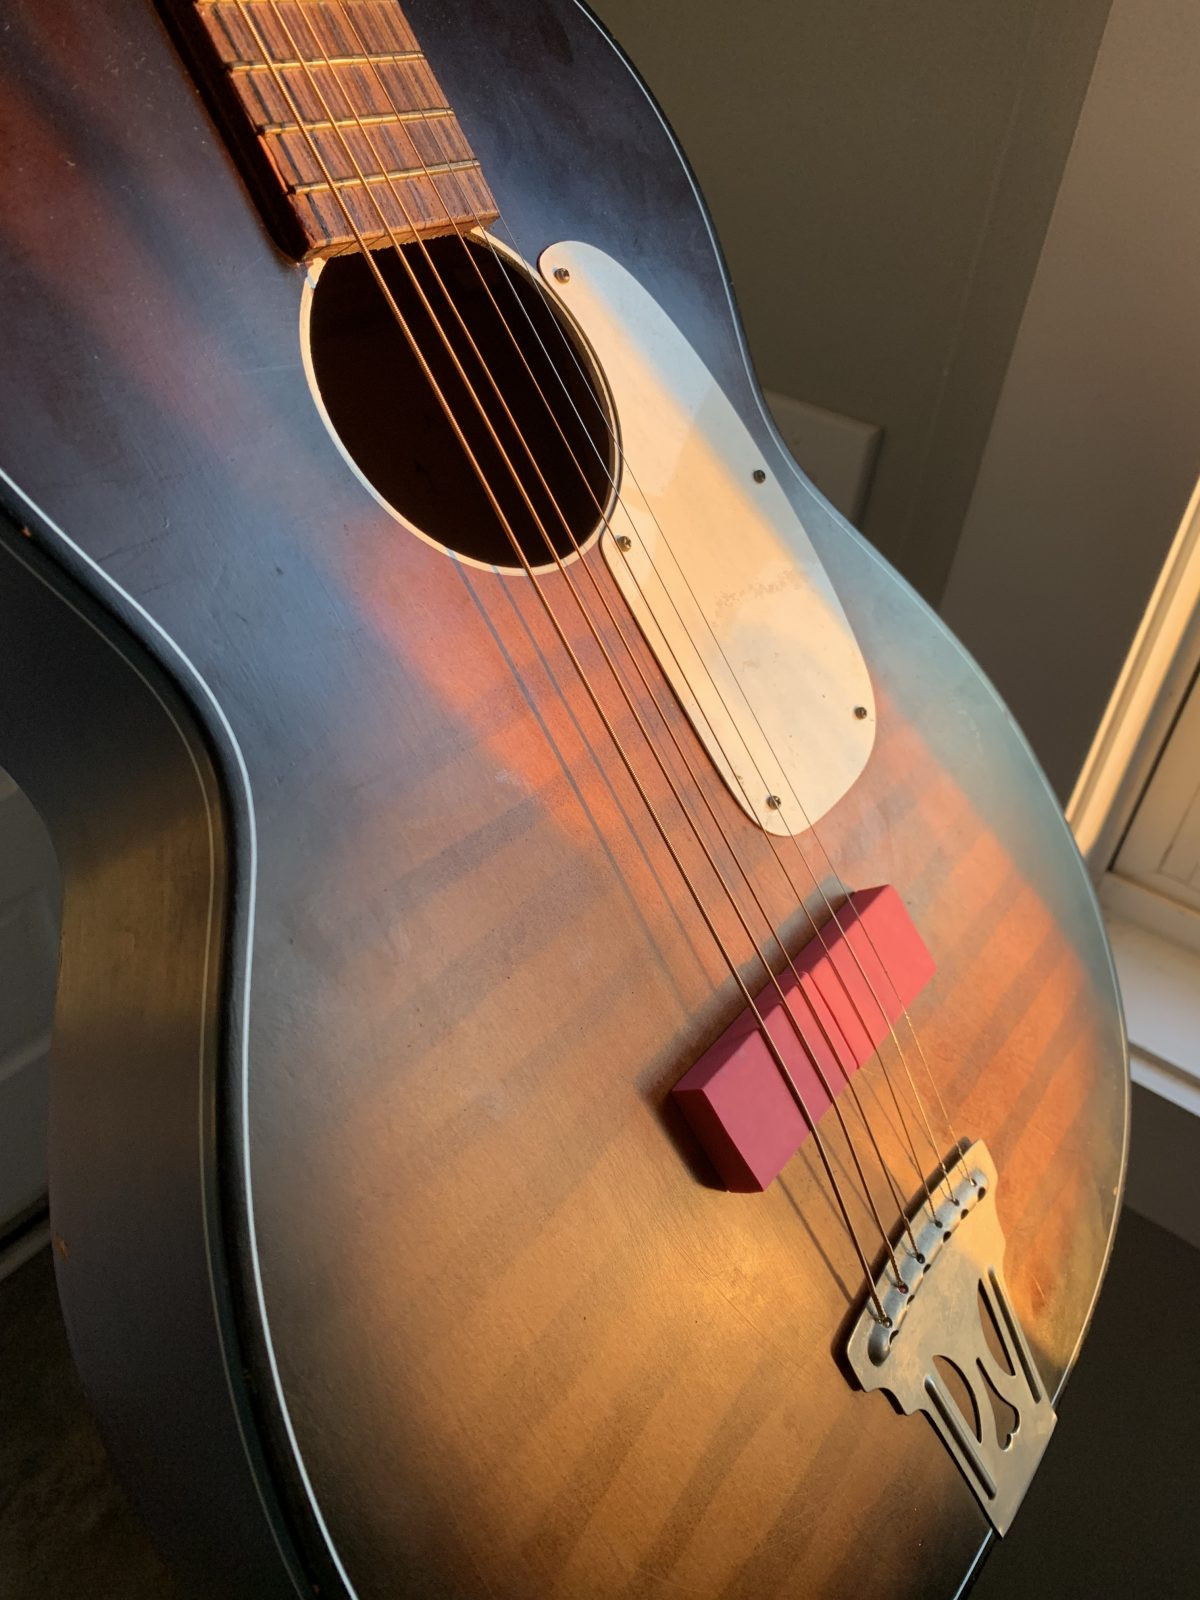 A wider rubber bridge configuration on an acoustic guitar, contrasting with the narrow bridge setup.
Beyond Erasers: Further Explorations & Future Ideas
The journey into rubber bridge guitars is far from limited to eraser bridges. The original article touches upon exciting avenues for further exploration. Shaping the rubber bridge into different forms, such as a tube shape, could yield unique tonal colors and responsiveness.
Furthermore, integrating a pickup opens up a world of amplified possibilities. A goldfoil pickup, often mounted in the soundhole, is a popular choice for rubber bridge guitars, allowing players to explore the textures through pedals, overdrive, and different amplifier combinations. This transforms the rubber bridge guitar from a purely acoustic instrument into a versatile studio tool capable of producing a wide range of effects-laden sounds.
The growing trend of drop-in rubber bridges for guitars like Jazzmasters and Jaguars signals an expanding interest in applying this modification to electric guitars as well. This fusion of the rubber bridge concept with electric guitar designs promises to unlock even more sonic territories.
Conclusion
The rubber bridge guitar is more than just a quirky modification; it’s a gateway to a unique and inspiring sound. Whether you’re drawn to its mellow acoustic textures or its potential for experimental amplified tones, the rubber bridge offers a rewarding journey for any guitarist seeking sonic adventure. The DIY accessibility, as highlighted in the original article, makes it an approachable project for players of all levels. So, if you’re looking to add a distinctive voice to your musical arsenal, consider taking the plunge into the intriguing world of the rubber bridge guitar. You might just unlock a whole new realm of creative expression.