Guitar Hero for the Nintendo Wii brought rhythm gaming into living rooms worldwide, capitalizing on the motion control craze of the late 2000s. Even years after its peak popularity in 2005, the charm of strumming along to your favorite tunes on the Wii remains strong for many, especially families who grew up with the console. If you’re a Guitar Hero enthusiast, you might find yourself dusting off your Wii or Wii U for a nostalgic jam session. However, the wear and tear of enthusiastic gameplay, especially by younger players, can sometimes lead to equipment damage, like a broken Guitar Hero guitar connector.
Encountering a broken connector on your Guitar Hero guitar can be frustrating when you’re ready to rock. Instead of immediately searching for a replacement on sites like eBay or Amazon, consider a cost-effective and satisfying DIY repair. This guide will walk you through how to fix your Guitar Hero Wii guitar using a readily available and inexpensive spare part: a Wii Nunchuk controller.
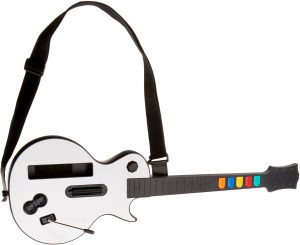
Repairing Your Guitar Hero Wii Guitar Connector
As illustrated in the image, a common point of failure is the connector that links the guitar to the Wii console. Fortunately, the Guitar Hero guitar uses the same connector type as the Wii Nunchuk. This makes an old, unused, or even broken Nunchuk an ideal donor for the repair. By sacrificing the connector from a Nunchuk, you can revive your beloved guitar and get back to shredding.
The repair process begins with disassembling the guitar to access the damaged connector. First, detach the guitar neck from the body. This modular design, likely intended for easier packaging and shipping by Activision, simplifies the initial disassembly. Once the neck is removed, locate and remove all the screws on the back panel of the guitar body. Set these screws aside in a safe place, as you’ll need them for reassembly. Carefully remove the back cover to expose the internal components of the Guitar Hero controller.
Upon opening the guitar, you’ll find the connector soldered to the controller circuit board. If you’re comfortable with soldering, you can desolder the broken connector directly. However, if you’re concerned about potentially damaging the board with excessive heat from a soldering iron, a safer approach is to cut the wires connected to the broken connector, leaving a bit of wire length attached to the board for easier soldering later.
Utilizing a Nunchuk for Parts
Next, take your donor Wii Nunchuk and disassemble it. Nunchuks are typically held together with screws, often Nintendo’s proprietary tri-wing screws. You can either carefully open the Nunchuk casing by removing these screws, or, to expedite the process, simply cut the cable leading into the Nunchuk, giving you access to the connector and wires. While opening the Nunchuk allows you to examine the internal wiring and verify the color code match (which is confirmed to be the same as the Guitar Hero guitar), cutting the cable is a faster method if you’re confident in proceeding directly to the soldering step. For those interested in exploring the internals of a Nunchuk, a tri-wing screwdriver can be purchased online.
Soldering and Reassembly
Now it’s time for soldering. Strip the ends of the wires from both the Nunchuk connector and the Guitar Hero guitar (if you cut the original connector wires as suggested). Solder each wire one by one, matching the colors between the Nunchuk connector wires and the wires leading to the Guitar Hero circuit board. Ensure each soldered connection is secure and properly insulated with electrical tape or heat shrink tubing. This insulation is crucial to prevent short circuits and add durability to your repair.
Carefully tuck the newly soldered wires and connections under the circuit board within the guitar body to keep them protected and organized. Route the Nunchuk connector wire through the original strain relief and through the designated hole where the Wii remote cable would typically pass through. Finally, reattach the back cover of the guitar and secure it with the screws you removed earlier. Reconnect the guitar neck to the body.
Testing and Alternative Solutions
With the guitar reassembled, it’s time to test your repair. Connect your Guitar Hero Wii guitar to your Wii or Wii U and launch Guitar Hero to see if the repair was successful. If everything is soldered correctly, you should be back to rocking out in no time!
Congratulations on successfully repairing your Guitar Hero guitar and saving money on a replacement! You’ve not only fixed your gaming equipment but also gained a valuable DIY skill.
If the thought of soldering and DIY repair seems daunting, or if you prefer a quicker solution, new Guitar Hero guitars for the Wii are still available for purchase online.