
Embarking on your guitar journey is an exciting adventure, and like any journey, starting with a strong foundation is key. It might seem tempting to jump straight into playing your favorite songs, but mastering the fundamental basics of guitar playing is crucial for long-term progress and enjoyment. Think of it as learning the alphabet before writing a novel. In this guide, we’ll cover the essential starting points that I consistently teach in my First Guitar lessons at guitarplayers.net: understanding the guitar’s anatomy, learning open string names, mastering basic fretting technique, and developing a fundamental strumming technique. Getting these core elements right from the beginning will pave the way for smooth learning and prevent frustration down the road.
Understanding Your First Guitar: Body Parts
Before you even play a note, it’s important to familiarize yourself with the different parts of your first guitar. Knowing the names of each component will help you understand instructions, communicate with other musicians, and troubleshoot any issues you might encounter. Think of it as learning the map before you start your road trip. The main parts include:
- Headstock: Located at the top of the guitar, it houses the tuning pegs and often displays the guitar brand.
- Tuning Pegs (Tuners): Used to adjust the tension of each string, thereby changing its pitch.
- Nut: A small piece, usually made of plastic or bone, located at the top of the fretboard. It guides the strings and sets the string height.
- Neck: The long wooden piece extending from the headstock to the body, containing the fretboard.
- Fretboard: The flat surface on the neck, inlaid with metal frets.
- Frets: The metal strips across the fretboard, dividing the neck into semitone intervals. Pressing a string down behind a fret shortens the string length and raises the pitch.
- Body: The main part of the guitar, which amplifies the sound of the strings.
- Soundhole (Acoustic Guitars): The hole in the body of an acoustic guitar that allows sound to resonate and project outwards.
- Pickguard: A plastic piece mounted on the body to protect the finish from scratches caused by strumming.
- Bridge: Located on the body, it holds the strings in place and transfers their vibrations to the body.
- Saddle: Part of the bridge that the strings rest on, affecting string height and intonation.
- Strings: The vibrating elements that produce sound when plucked or strummed.
Understanding these basic components of your first guitar is your first step towards becoming a confident player.
Memorizing Open String Names: E A D G B e
One of the very first things any beginner needs to learn is the names of the open strings on the guitar. “Open strings” refer to the strings played without pressing down on any frets. Knowing these names is absolutely essential because it’s the foundation for understanding scales, chords, and music theory in general. Imagine trying to navigate without knowing North, South, East, and West – that’s what playing guitar without knowing string names is like!
The open string names, from thickest to thinnest (lowest pitch to highest pitch), are E, A, D, G, B, and e. To help my students remember these, I use a simple mnemonic rhyme that, while a bit whimsical, is incredibly effective: Elephants And Donkeys Grow Big Ears.
- E (6th string) – Thickest, lowest E string
- A (5th string)
- D (4th string)
- G (3rd string)
- B (2nd string)
- e (1st string) – Thinnest, highest e string
Practice reciting this rhyme and identifying each string on your first guitar. Start by naming them in order, then try mixing them up. For example, ask yourself, “What’s the name of the third string?” (D string). Being able to quickly recall the open string names will make learning new concepts much easier. When I say “place your finger on the 2nd fret of the D string,” you’ll know exactly where to go without hesitation.
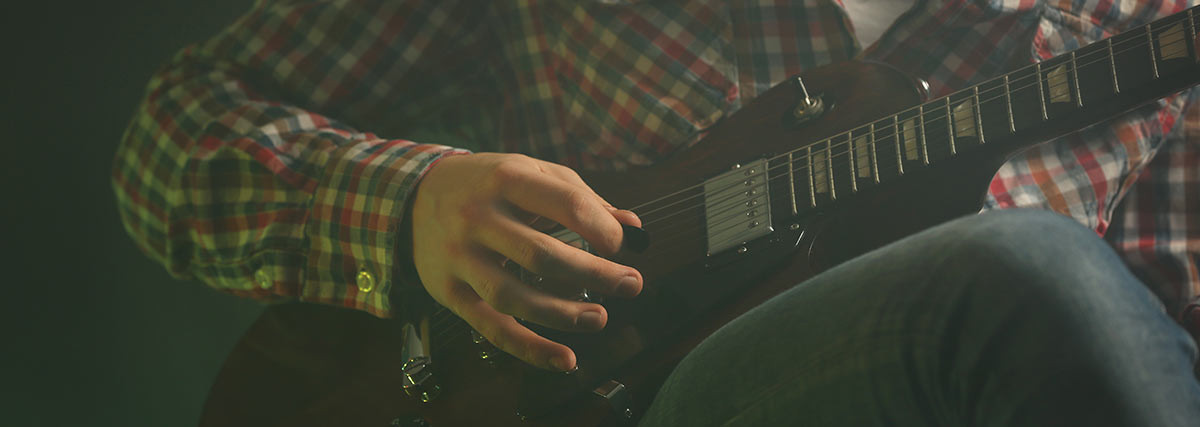
 Man playing electric guitar with purple hue
Basic Fretting Technique: Finger Placement for Clear Notes
Another fundamental aspect for beginners on their first guitar is mastering correct fretting technique. This refers to how you use your fretting hand (usually the left hand for right-handed players) to press down on the strings to produce clear notes. A common misconception among beginners is that fingers should be placed in the middle of the fret. Some even get taught this incorrect method! Let me clarify: this is wrong.
The optimal finger placement for fretting notes is just behind the fret. Not directly on top of the fret, and certainly not in the middle of the space between frets, but just behind it, closer to the bridge. This technique offers several advantages:
- Clear Sound: Placing your finger just behind the fret allows the string to vibrate cleanly, producing a clear and resonant note.
- Less Pressure: You’ll need to apply less pressure to fret the note cleanly, reducing finger fatigue and making playing more comfortable in the long run.
- Sustain: Notes will sustain longer when fretted correctly, as the string vibrates more freely.
Practice fretting a single note on your first guitar. Start with the 1st fret of the low E string. Focus on placing your fingertip just behind the fret, applying enough pressure to produce a clear sound without buzzing. Experiment with different finger positions to feel the difference and hear how it affects the tone. Developing good fretting technique from the start is essential for playing cleanly and efficiently.
Basic Strumming Technique: Getting Your Right Hand Moving
Once you’re comfortable with basic fretting, it’s time to coordinate your right hand (or strumming hand) to create rhythm and music on your first guitar. For beginners, I often start with simple techniques, depending on whether they are using a pick or prefer fingerstyle playing.
Thumb Downstrokes (No Pick): If you’re just starting and don’t have a pick, or prefer fingerstyle, begin by using your thumb to pluck the thickest string (low E string) in a downward motion. This is a great way to develop basic right-hand coordination and get a feel for rhythm.
Pick Strumming (Using a Plectrum): If you are using a guitar pick (plectrum), hold it correctly. Don’t let too much of the pick stick out, as this can feel awkward. Hold it firmly enough for control, but relaxed enough to allow for smooth movement. Strike the pick across the strings in a downward motion. Experiment with different amounts of pressure and angles to find what feels and sounds best.
Pick Grip: The way you hold the pick is also crucial. A good starting point is to hold the pick between your thumb and index finger, with just a small corner of the pick exposed. Ensure your wrist is relaxed and not at an awkward angle. A relaxed wrist is key to fluid and efficient strumming.
Practice strumming single strings or all six strings with downstrokes. Focus on maintaining a steady rhythm and keeping your strumming motion smooth and controlled. This basic strumming technique will be the foundation for learning more complex strumming patterns later on.
 Man strumming acoustic guitar
Simple Riffs to Get You Playing Music
After grasping the basics, it’s incredibly motivating to start playing recognizable music on your first guitar. Learning simple riffs is a fantastic way to apply your new skills and make music quickly. A classic beginner riff is “Smoke On The Water” by Deep Purple. While often played on the D string for tonal accuracy, you can start learning it on the low E string, as you’ve already been practicing there.
For “Smoke On The Water,” use different fingers in your fretting hand. A common mistake beginners make is using only one finger for everything. For this riff, use:
- 1st finger: 3rd fret
- 3rd finger: 5th fret
- 4th finger: 6th fret
This finger arrangement keeps your hand in one position, minimizing unnecessary movements and promoting efficient fretting. Other great simple riffs for beginners include “Sunshine of Your Love” by Cream and “Seven Nation Army” by The White Stripes. These riffs are not only easy to learn but also instantly recognizable and fun to play, boosting your confidence and enthusiasm.
Moving on to Open Chords: Expanding Your Musical Palette
Once you’re comfortable with simple riffs, the next logical step on your first guitar journey is to learn open chords. Open chords are named “open” because they utilize open strings combined with fretted notes in the lower positions of the guitar neck (closer to the headstock and nut). Mastering a set of basic open chords unlocks a vast repertoire of songs. In fact, knowing just a handful of open chords will allow you to play a significant percentage of popular songs.
When teaching open chords, I like to focus on learning them within the context of a song. A great song to start with is “Stand By Me” by Ben E. King. For this song, you’ll need to learn the chords G, E minor (Em), C, and D. I teach students how to form these chords both by showing them finger positions and by using chord diagrams. Chord diagrams are visual representations of chords, and understanding how to read them is an essential skill for any guitarist.
Reading Chord Diagrams: Chord diagrams represent the guitar fretboard as if you were looking at it upright. The horizontal lines represent frets, and the vertical lines represent strings. Numbers or symbols indicate which fingers to use and which strings to fret. “X” above a string means don’t play that string, and “O” means play the string open.
Once you can form the chord shapes, practice strumming each chord individually to ensure all strings ring clearly. Start with one down strum per chord to focus on clean fretting hand technique. Gradually introduce more complex strumming patterns with downstrokes and upstrokes to add rhythm and musicality to your chord playing.
* Chord Fretting Exception: While generally, you should fret just behind the fret, there are exceptions, especially with chords. For example, in an A major chord, the finger on the D string might fall slightly on top of the fret due to the close proximity of the fingers. In these situations, strong fretting technique becomes even more crucial to maintain a clear sound.
Power Chords: Unleash Your Inner Rocker
After gaining some experience with riffs and open chords, it’s time to graduate to power chords on your first guitar. Power chords are a staple in many genres, particularly rock music and its subgenres. They are relatively simple to learn and incredibly versatile.
I usually introduce power chords starting on the 5th fret of the low E string, as the lower frets can be a bit too spread out for beginners. The power chord shape is essentially a two-finger chord (sometimes three), and it’s movable, meaning you can slide it up and down the neck to play different power chords.
A good starting point for practicing power chords is the chorus of “Sunshine of Your Love”, especially if you’ve already learned the main riff. However, the quintessential power chord anthem is “Smells Like Teen Spirit” by Nirvana. Almost every student, even if they say they don’t know it, recognizes the iconic intro riff as soon as they hear it.
“Smells Like Teen Spirit” is excellent for power chord practice because it uses power chords played off both the low E and A strings and involves quick position shifts on the neck. It also incorporates a specific strumming pattern with upstrokes, adding another layer of rhythmic complexity. While the entire song, including the guitar solo with string bending, is a fantastic learning piece, focusing on the power chords in the intro and verses is a great next step in your guitar journey.
By mastering these fundamental basics on your first guitar – from understanding its anatomy to playing simple riffs, open chords, and power chords – you’ll build a solid foundation for your musical journey. Remember, consistent practice and patience are key. Enjoy the process of learning and making music!